How to Install Window Films: Step-by-Step Guide for Home
Learn how to easily install window films for improved privacy, UV protection, and energy efficiency. Step-by-step guide for a smooth and professional installation process at home.
HOME IMPROVEMENT
Hamza
1/8/20254 min read
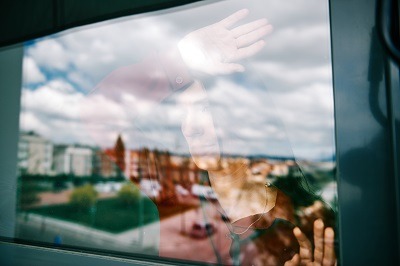

Window films are thin, pliant sheets that can be applied onto glass surfaces for different purposes such as improving privacy, energy efficiency, and reducing the impact of ultraviolet radiation. These films come in various styles, including clear, shaded, patterned, and opaque, making them ideal for both commercial and residential settings.
Benefits of Having Window Films
There are many advantages to using window films. From providing privacy to lowering energy consumption, these films significantly impact both comfort and appearance.
Making Yourself Vanish: Window films allow you to see out while preventing others from seeing in.
Energy Savings: Films help cut down on heat gains during summer while limiting heat losses during winter, resulting in reduced utility costs.
Reduced Glare: They lessen the effect of glare on computer screens, making light areas more suitable for comfortable working conditions.
Protection from UV Rays: Blocks harmful sun rays and prevents your furniture from fading.
Safety & Security: Acts as reinforcement to prevent glass breakage during accidents or robbery attempts.
These window films not only provide higher levels of privacy and energy savings, but also protect your skin from dangerous ultraviolet rays and enhance security by preventing glass shattering.
Types of Window Films
Different kinds of window films have been designed for various purposes. Whether you need privacy enhancement, UV protection, or security, there’s a film type suitable for your needs.
Static Cling Films: Non-adhesive, temporary films that can be easily installed and removed.
Adhesive Films: Stronger, more permanent films ideal for long-term use.
Decorative Films: Films with patterns or frosted designs for aesthetic enhancement.
Solar Films: These block UV rays and heat, lowering the temperature inside your home.
Security Films: Reinforces glass to prevent it from breaking, thus enhancing safety.
Window films come in various types such as energy-saving, privacy, safety, and decorative options. There’s a choice for every need depending on individual preferences.
Preparation for Installation
Proper preparation is essential for a successful installation. Having the right tools and materials ensures a smooth process and professional-looking results.
Basic Tools Needed:
Squeegee: Used to smooth out air bubbles during installation.
Utility Knife: Used to trim off excess film during application.
Spray Bottle: For applying soapy water to windows before the film is applied.
Microfiber or Lint-Free Cloth: Used to clean the windows before installation.
Measuring Tape: For accurately measuring window dimensions.
Straight Edge or Ruler: Ensures clean, even cuts.
Plastic Card: Helpful for smoothing out corners and difficult-to-reach areas.
Materials Needed:
Window Film: Choose the appropriate type (adhesive, static cling, etc.).
Soapy Water Solution: A mixture of baby shampoo or dish soap and water for easy film application.
Glass Cleaner: To clean windows before installation.
Masking Tape (optional): Holds the film in place during application.
Optional Accessories:
Heat Gun or Hair Dryer: For shrinking certain types of films to ensure a tight fit.
Edge Trimmer Tool: For precise trimming of the film edges.
Gloves: Prevent fingerprints from getting onto the film during installation.
Having the right tools and materials in place ensures a smooth installation process with minimal errors, leading to professional results.
Step-by-Step Installation Guide
This guide outlines the step-by-step process involved in installing window films. With the right preparation, applying the film becomes an easy and rewarding DIY task.
Step 1: Measure Your Windows Accurately
Measure each window’s dimensions accurately and add 1–2 inches around all sides for trimming.
Step 2: Clean the Window Surface Thoroughly
Clean the glass with a glass cleaner to remove dirt, oils, and smudges. Then prepare the soapy water solution (water mixed with baby shampoo or dish soap).
Step 3: Set Up Your Work Area
Choose a clean, well-lit area and protect your workspace with a soft cloth or blanket.
Step 4: Cut the Film to Size
Cut the window film according to the measured dimensions, leaving extra material around the edges.
These steps ensure that you’re fully prepared for a successful window film installation.
Solving Common Installation Problems
Despite preparation, common issues may arise during installation. Here are some common problems and how to solve them for a flawless result.
Air Bubbles Under the Film
Cause: Air trapped during installation.
Solution: Spray more soapy water and smooth the bubbles with a squeegee.
Wrinkles or Creases
Cause: Poor alignment or uneven smoothing.
Solution: Peel back the affected area, respray with soapy water, and smooth again.
Peeling Film Edges
Cause: Weak adhesion or improper trimming.
Solution: Press down edges using a squeegee or use clear glue to secure them.
Film Out of Alignment
Cause: Incorrect placement of the film.
Solution: Lift the film and reposition it with the help of soapy water.
Hazy or Cloudy Appearance
Cause: Trapped moisture under the film.
Solution: Let the film dry for 24–48 hours, or use a hairdryer on low heat to speed up the process.
By addressing these issues early, your installation can be smooth and flawless.
While DIY home window film installation can seem like a cost-effective option, it often comes with challenges such as bubbles, uneven application, and difficulty achieving a professional finish. To ensure flawless results and long-lasting performance, trust our expert team for professional window film installation. We bring precision, experience, and the right tools to get the job done right the first time, providing you with maximum privacy, UV protection, and energy efficiency.
Maintenance and Care Tips
To extend the life of your window films and maintain their appearance, proper care is essential. Here are some tips to keep them in top condition.
Wait Before Cleaning: Wait at least one month before cleaning the film to allow it to cure properly.
Use Mild Cleaners: Avoid strong chemicals. Opt for a gentle detergent solution or glass cleaner without ammonia.
Proper Cleaning Procedure: Spray cleaner onto a soft cloth and gently wipe the film’s surface to avoid scratching.
Avoid Sharp Objects: Do not use abrasive cleaning pads or scrapers that may damage the film.
Regular Inspection: Check the edges of the film regularly for any signs of peeling and fix them as needed.
Proper maintenance ensures that your window films last longer and stay looking great.
Additional Questions
Am I capable of installing window film by myself?
Yes, most window film installations can be done by DIYers with the right tools and instructions. However, larger windows or intricate patterns may require professional help.
How long does it take to install window film?
Installation typically takes 30–60 minutes per window, but larger projects may take several hours.
Can I remove and replace a window film?
Yes, you can easily remove and replace window films without affecting the glass beneath.
Does window film damage glass or violate warranty policy?
Quality window films are designed to protect glass, but it’s advisable to check with the manufacturer regarding any potential impact on your warranty.
What is the difference in cost between DIY installation and professional installation?
DIY installation typically costs $1–$5 per square foot, while professional installation ranges from $5–$15 per square foot depending on the type of film and project complexity.
tintsandfilms@gmail.com
Connect with us
(647) 606-5029
Our Services
Our Policy & Contact us
Areas served: Greater Toronto Area and all nearby